
Blog
Garden Hand Tools for UAE Gardens: The Few You Really Need and How to Care for Them


A useful garden hand tool kit starts with the jobs you actually do. For most UAE homes that means three things: a trowel and hand fork for potting and planting, a bypass pruner for living stems up to about 25 mm thick, and a five minute cleaning routine with 70% alcohol or a 1 to 9 bleach solution so the pruner does not carry disease from one plant to the next. A balcony of herb pots needs a different kit from a villa with hedges and mature trees, so start with tools for planting and small cuts, then add specialised equipment only when there is a clear need.
By the end of this article you will be able to match each tool to a branch size in millimetres, mix a disinfectant in the right strength for a spray bottle or a bucket, sharpen a bypass blade at the angle university extension services give, and store the kit so that UAE heat, dust, salty irrigation water and humid summer nights do not ruin it. It does not prescribe a pruning calendar: when to prune depends on the plant, its flowering cycle and its condition.
Choose tools for your growing space
| Growing space | Useful starting tools | Add only when needed | What you can skip |
|---|---|---|---|
| Balcony pots and planters | Hand trowel, small fork and a suitable pruner or snips | Small rake for larger planting troughs | Hedge shears, loppers, spade |
| Vegetable or flower beds | Trowel, hand fork, hand rake and bypass pruner | Long handled spade or fork for beds you dig every season | Hedge shears unless the bed is edged with a hedge |
| Villa shrubs and hedges | Planting tools and a bypass pruner | Hedge shears, rated loppers or a pruning saw | A second planting set if you already own one |
| Farm or large garden | Bypass pruner per worker, loppers, pruning saw | Spare pruner so one can soak in disinfectant while the other is used | Decorative light duty tools that will not survive daily use |
Before buying, check the room between your plants, the size of your containers and where you will store the tools. For a small balcony, a compact kit that fits in a dry cupboard is often more practical than a large set with tools you rarely use. A villa garden with bougainvillea, ixora or a hedge of conocarpus is the case where a cutting tool for each branch size pays for itself.
Match the tool to the branch: sizes in millimetres
Most tool damage and most torn plant stems come from one mistake: using a tool on a branch that is too thick for it. Extension guides give branch limits in inches. Here they are converted to millimetres, which is easier to check with a ruler or the jaw of the pruner itself.
| Tool | Branch size the source gives | In millimetres | Source |
|---|---|---|---|
| Hand pruner (bypass) | Up to one inch (2.5 cm) | Up to about 25 mm | University of Maryland Extension |
| Hand pruner (bypass) | About 3/4 to 1 inch, depending on how hard the wood is | About 19 to 25 mm | UC Master Gardeners of Marin County |
| Loppers | 1.5 to 2 inches | About 38 to 51 mm | University of Minnesota Extension |
| Loppers | Up to three inches (seven cm) | Up to about 70 to 76 mm | University of Maryland Extension |
| Pruning saw (9 to 13 inch blade) | Branches over 1.5 inches | Over about 38 mm; blade 23 to 33 cm | UC Master Gardeners of Marin County |
| Hedge shears | Hedges only | Soft outer growth, not branches | University of Maryland Extension |
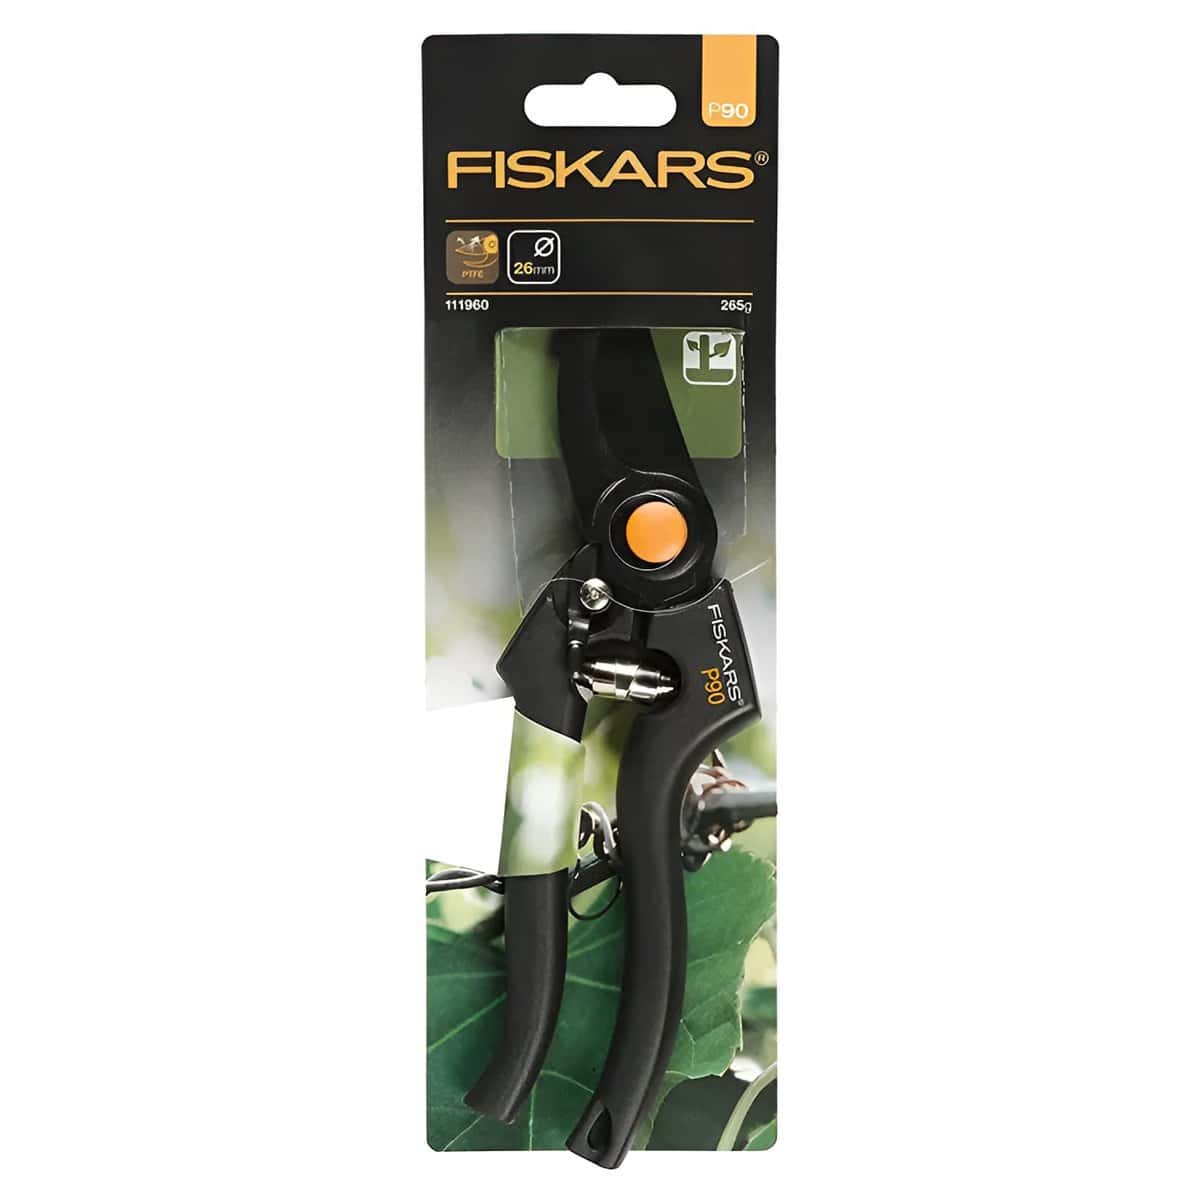
Two things follow from this table. First, the limits overlap and depend on the wood: a 20 mm dead, dry branch of a hard shrub can be harder to cut than a 25 mm green stem of a soft one. Second, a maker’s rated capacity is the most a tool will take, not a comfortable everyday cut. The Fiskars P90 product page gives a 26 mm cutting capacity, which sits right at the top of the university range for hand pruners. If you regularly cut stems near that size, a lopper is the right tool and the pruner will last longer.
A quick field test: if you need two hands on a one handed pruner, have to rock it from side to side, or the stem crushes before it parts, the branch is too big for that tool. Stop and move up a size.
1. A hand trowel for planting and potting
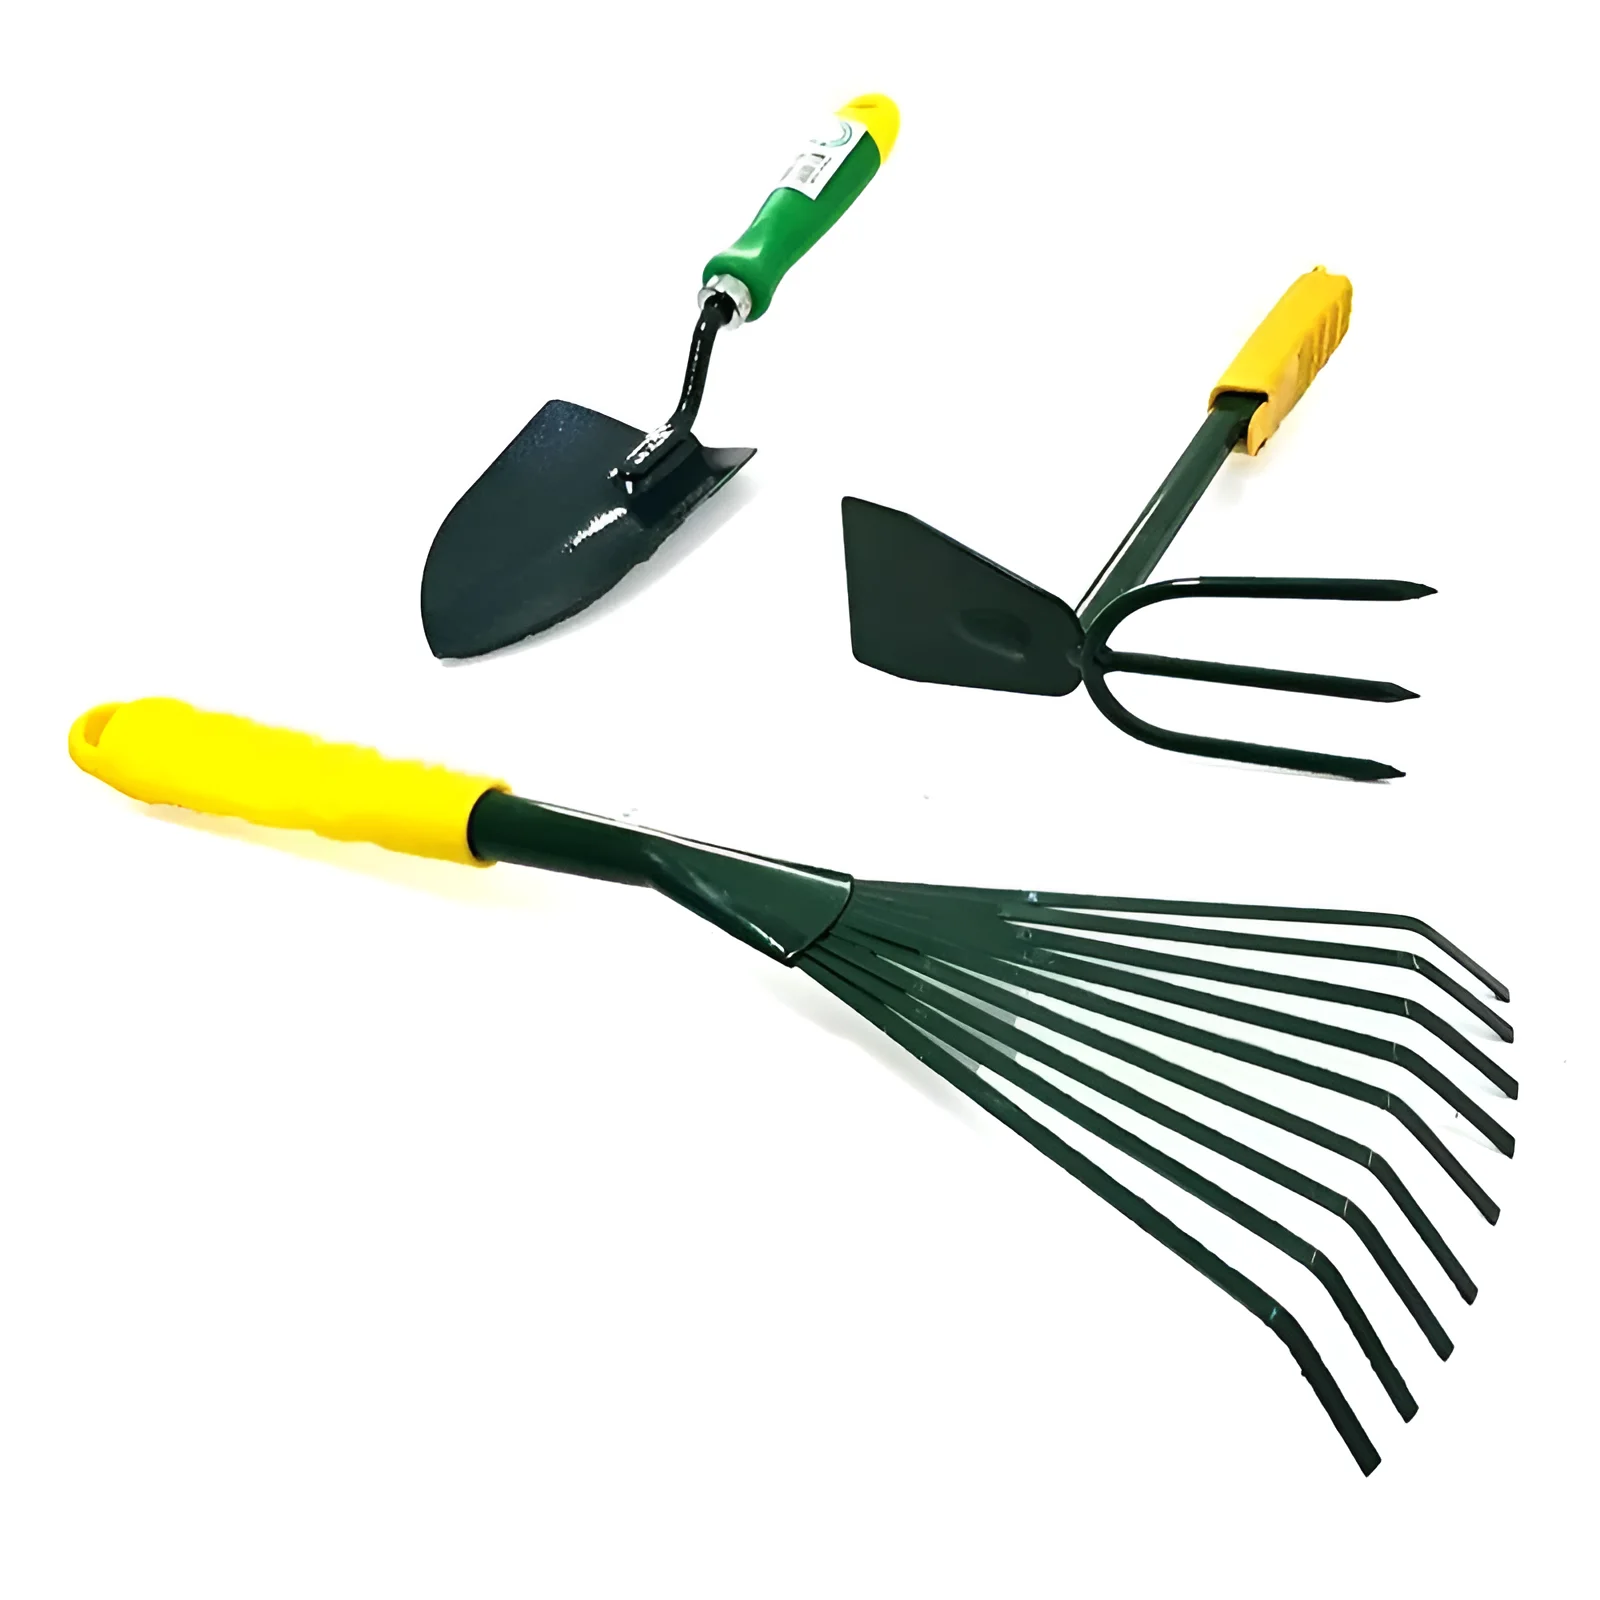
Use a trowel to move potting mix, make small planting holes and position seedlings. A narrow blade fits between established plants; a broader scoop is convenient when filling containers. UC Master Gardeners of Marin County say trowels come in several lengths and call 14 inches (about 36 cm) the most versatile. Check that the handle feels secure and the head has no movement at its joint.
Do not use a small trowel as a lever against buried rubble or large roots. If the soil resists, inspect what is underneath rather than bending the tool. In many UAE villa gardens, construction rubble and compacted sand sit a short way under the planting soil, and that is where trowel necks bend. Take care around irrigation tubing: a trowel blade can cut a drip lateral in one stroke, so find the line with your fingers before you dig near an emitter. Our drip irrigation guide shows how those lines are laid out.
Use the trowel as a measure as well. A hori hori garden knife has measurements printed on its blade, and you can mark your own trowel with a permanent marker at 2 cm, 5 cm and 10 cm. That makes it easy to follow the sowing depth on a seed packet or plant a seedling at the depth it sat in its nursery pot.
2. A hand fork for small areas
A hand fork or cultivator helps loosen the surface of an empty planting area and lift small weeds. Work gently around established plants; deep cultivation can disturb their roots. A hand tool is useful for precision, but it is not a substitute for appropriate equipment on a large or heavily compacted bed.
In sandy UAE soil the fork’s main job is mixing: working compost or vermicompost into the top 10 to 15 cm of a planting spot, or breaking the crust that forms on pots watered with salty water. If you are adding an amendment, first decide whether the soil needs it. Our vermicompost guide explains how to approach that separate decision.
3. A small rake for seedbeds
A hand rake can collect loose debris and smooth a small area before sowing. UC Master Gardeners of Marin describe a good hand rake as having flexible, fan shaped tines that will not damage delicate plants and a size compact enough for tight beds and under dense bushes. Remove stones without dragging the rake through nearby seedlings. Use the seed packet’s sowing depth guidance: a level surface helps you work consistently, but does not determine the correct depth on its own.
For a combined planting kit, GreenAsh’s 3-Piece Gardening Tool Set contains a trowel, rake and fork. The current listing describes metal heads and plastic handles, but gives no tool lengths or weights. Compare that compact set with buying individual tools if you already own one or two of them.
4. A bypass pruner for living stems
Bypass pruners cut with a curved blade that slides past a broader blade, like scissors. Anvil pruners close a straight blade onto a flat block. University of Maryland Extension calls bypass pruners superior because they reduce torn or crushed plant tissue, and warns against forcing branches that are too large for the tool. UC Master Gardeners of Marin go further and say anvil pruners should be used only on dead branches, because they crush living tissue.
That matters most on the plants you cut often. For roses, hibiscus, citrus, frangipani and tomato side shoots, a bypass pruner is the right choice. An anvil pruner can still be handy for dry, dead wood, but it is not the first pruner to buy.
How to check fit before you buy
- Hand size: with the pruner fully open, your fingers should close around the lower handle without stretching. A pruner that opens too wide for your hand means you cut with your fingertips, which is weak and tiring.
- Left or right hand: Marin’s guide says to choose a model for your dominant hand. Many pruners are made for right handers; check whether the product page says left hand suitable.
- Safety catch: a catch that holds the blades closed protects your hand in a pocket or bucket and keeps the edge safe in storage.
- Replaceable parts: a pruner held together by a bolt and nut can be taken apart, cleaned and tightened. A riveted one cannot.
The Fiskars P90 Bypass Pruner is a relevant option in GreenAsh’s catalogue. Its listing specifies a 26 mm cutting capacity, hardened steel blades and a safety catch. That is a product specification, not an instruction to force every 26 mm branch through it. Check the supplied instructions and the condition of the wood.
Other pruners in our range are listed below in the comparison table. The Beorol Heavy-Duty Pruning Shears page says it is a bypass design suitable for left or right handed users with a safety lock, but gives no cutting capacity. The Heavy-Duty Pruning Shears (Greenlawn) and Beorol Floral Pruning Shears pages do not say whether they are bypass or anvil and give no capacity, so we suggest the floral pruner for flowers, herbs and soft stems only, which is what its page names.
If you take cuttings for propagation, start with a clean bypass cut rather than a crushed or torn stem end. Our rooting hormone guide covers how to prepare the cutting itself.
5. Hedge shears only if you have a hedge
Hedge shears suit trimming the outer growth of a hedge; they do not replace branch by branch pruning. University of Maryland Extension says to use them only for hedges, and notes that twisting the handgrips strains the joint and causes excessive wear. If a twig will not cut cleanly between the blades, use a pruner on it instead.
Choose a weight and handle length you can control from stable footing. Extendable handles may improve reach but can make a tool harder to control when fully extended, because the weight of the blades sits further from your hands. The Telescopic Hedge Shear in our range is listed as 60 cm with hardened steel blades and aluminium handles; the page does not say whether 60 cm is the blade or the closed length, or how far the handles extend.
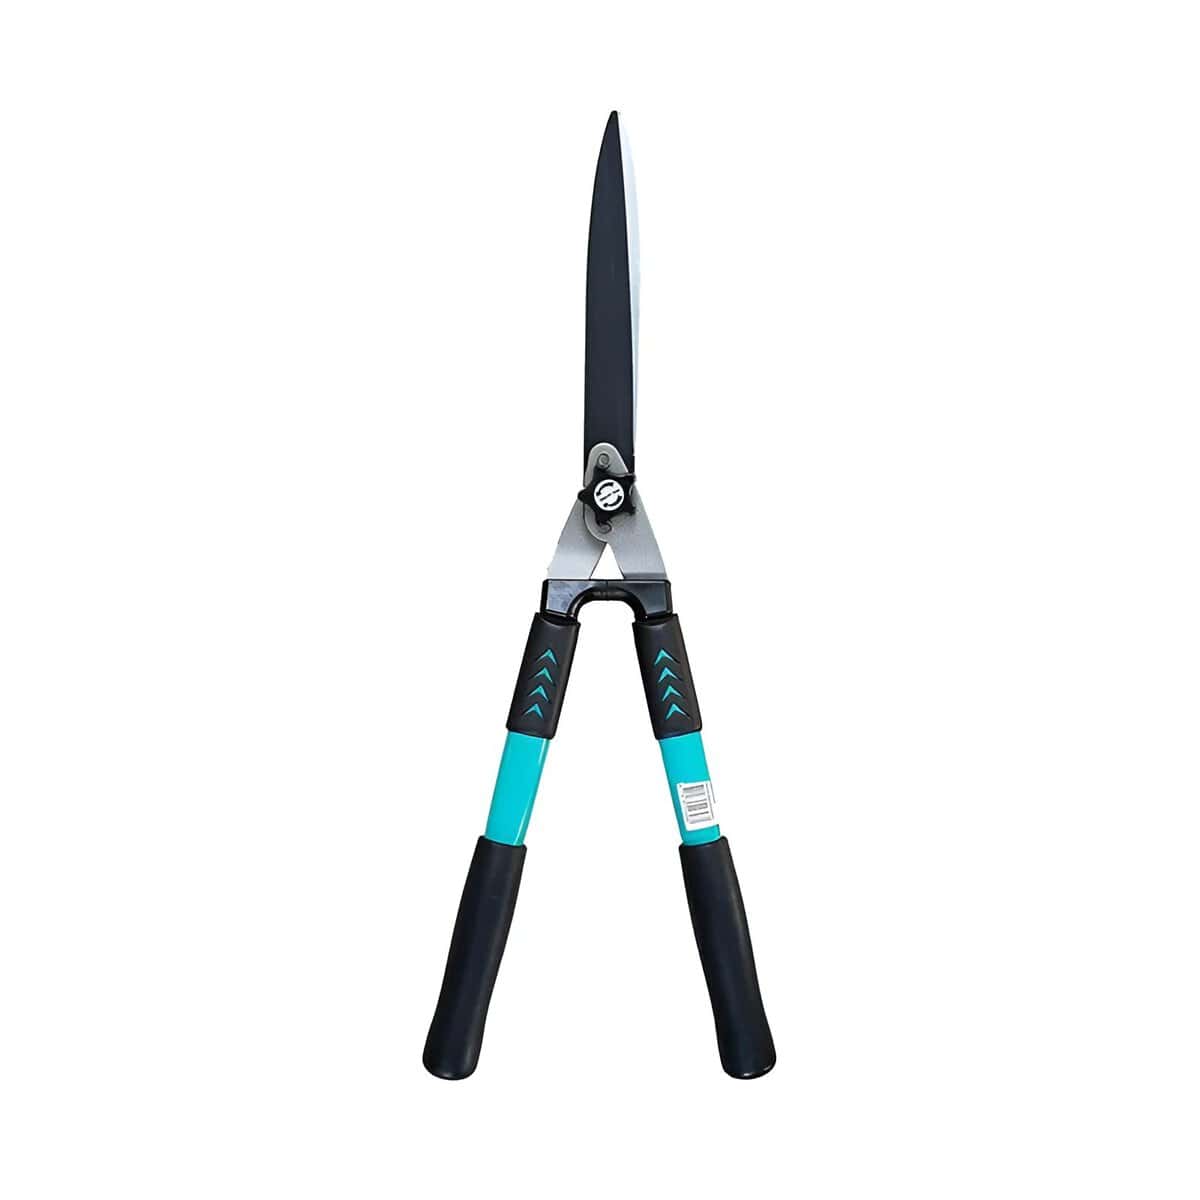
Do not overreach, work beneath falling branches or assume a longer tool makes a high cut safe. The hedge shear page says the handles help reach high branches without a ladder; we would still treat anything above shoulder height as a job for a stable platform or a second person. For large trees, palms or work beyond a comfortable ground level reach, arrange appropriate professional help. Never cut near overhead electric cables with any tool.
What about loppers, saws and gloves?
When your regular cuts go past about 25 mm, you need loppers, and past about 38 mm a pruning saw, according to the university figures above. At the time of writing we could not find loppers, pruning saws or gardening gloves in our store, so buy them from a garden or hardware shop and check that the lopper’s rated capacity is printed on the pack. Marin’s guide recommends a pruning saw that cuts on the pull stroke, with a sheath if the blade does not fold.
Gloves are not optional for pruning thorny plants. Marin recommends breathable gloves with nitrile palms for grip, and gauntlet style gloves that cover the wrists when pruning thorny plants. Bougainvillea, roses and some palms are the obvious UAE cases; our bougainvillea guide covers the plant itself.
Compare the hand tools we stock
This table uses only what each product page says. Where a page does not give a size or a blade type, we say so.
| Product | Type and material on page | Size or capacity on page | Use the page names | Care text on page | Who it suits |
|---|---|---|---|---|---|
| Fiskars P90 Bypass Pruner (29754) | Bypass; hardened steel blades; non-slip handle; safety catch | 26 mm cutting capacity | Shrubs, stems and branches | Lock the pruner after use | Main pruner for a villa garden or regular shrub pruning |
| Beorol Heavy-Duty Pruning Shears (29044) | Bypass; high-carbon steel; left or right handed; safety lock | Not given | Thick branches and stems | None | Left handed gardeners; check capacity on the tool |
| Heavy-Duty Pruning Shears (29766) | High-carbon steel; spring loaded; bypass or anvil not stated | Not given | Branches, stems, flowers, small shrubs | Wipe blades after each use | Light general cuts until the blade type is confirmed |
| Beorol Floral Pruning Shears (29769) | Rust resistant steel blade; blade type not stated | Not given | Flowers, stems and small branches | Wipe blades after each use | Balcony flowers and herbs |
| Telescopic Hedge Shear (29763) | Hardened steel blades; aluminium extendable handles | 60 cm (not stated whether blade or overall) | Hedges, shrubs and bushes | None | Villas with a hedge |
| 3-Piece Gardening Tool Set (29742) | Trowel, rake and fork; metal heads, plastic handles | Not given | Planting, weeding, aerating soil | None | First kit for beds and pots |
| Durable Garden Hand Trowel (29734) | Rust resistant metal blade; wooden handle | Not given | Digging, planting, transplanting | Clean after use | Replacing a single lost or bent trowel |
| Beorol Floral Hand Trowel (29775) and Hand Cultivator (29772) | Rust resistant steel or metal; floral handles | Not given | Digging, potting, loosening soil | None | Light potting work on a balcony |
| Fiskars Xsharp Axe and Knife Sharpener (29759) | Ceramic grinding wheel in a plastic case | Axe slot and knife slot | Axes and knives | Wipe the blade after sharpening | Not named for pruners on its page, so we do not suggest it for them |
A practical tool care routine
Clean before disinfecting
Brush away visible soil and plant debris, then clean off remaining grime as the tool manufacturer directs. Disinfecting a dirty blade is less effective: the University of Minnesota’s cleaning guide says leftover dirt interferes with the disinfection process and suggests soap or detergent and a stiff brush. Sap is the stubborn part on pruners. Wash it off with warm soapy water while it is fresh; dried sap holds dirt and moisture against the steel.
When to disinfect
Disinfection is especially important after working with an infected plant and before moving to another susceptible plant. A routine of a quick alcohol spray between plants costs almost nothing. The University of Arizona Extension summarises a Washington State University review with practical rules: know your pathogen and use common sense; disinfect when working with viruses, viroids, vascular fungi or bacteria; avoid cutting active, oozing cankers and wait until they dry; always disinfect when pruning irreplaceable plants; and prune diseased plants last.
In a home garden that means: disinfect before and after any plant with dieback, cankers, wilting branches, oozing bark or mottled virus like leaves; between tomato and pepper plants when one is sick; and before you prune a mature citrus or a plant you could not replace.
Which disinfectant, at what strength
Use a suitable disinfectant according to its directions, including contact time, handling and any rinsing requirements. Do not mix cleaning chemicals or assume a quick spray works against every pathogen. The university figures are these:
| Disinfectant | Strength | How to use it | Corrosion | Best for |
|---|---|---|---|---|
| Isopropyl (rubbing) alcohol | 70% or higher, used undiluted | Dip, wipe or spray the blades between plants; UC Master Gardeners say it works almost immediately and needs no rinse | Not corrosive (UC Master Gardeners) | Pruners and small hand tools, routine use |
| Household bleach (5.25% sodium hypochlorite) | 1 part bleach to 9 parts water, made fresh | After diseased plants, UC Master Gardeners say soak for 30 minutes, use within 2 hours of mixing, then rinse, dry and oil | Corrosive; can pit and nick blades (Minnesota) | Spades, rakes, stakes, cages and pots; Minnesota does not recommend it for sharp edged pruning tools, so if you use it on pruners after known disease, rinse, dry and oil them |
| Cleaner with 0.1% alkyl dimethyl benzyl ammonium saccharinate | Used as sold, not diluted | Dip, spray or soak for 2 minutes, then air dry (Minnesota) | Does not corrode metal (Minnesota) | Pruners, trowels, labels, small pots |
Household cleaners sold in the UAE under familiar brand names may not contain the same active ingredient as the products tested in the United States, so read the active ingredient on your bottle before you rely on the third row.
Worked mixes for a 10% bleach solution
The 1 to 9 ratio is for bleach that contains 5.25% sodium hypochlorite, which gives about 0.5% in the finished mix. Measure with a kitchen jug you keep only for garden use, and mix in a plastic container, as Minnesota advises.
- 500 ml spray bottle or jar for pruner heads: 50 ml bleach plus 450 ml water.
- 1 L jug: 100 ml bleach plus 900 ml water.
- 5 L bucket for spades, rakes and stakes: 500 ml bleach plus 4.5 L water.
If your bottle gives a different sodium hypochlorite percentage, divide 525 by that percentage to get millilitres of bleach per litre of finished solution. For a bleach labelled 4%, that is 525 divided by 4, or about 130 ml of bleach made up to 1 L with about 870 ml of water. If the label gives no percentage, use 70% alcohol for pruners instead.
The solution weakens with time, which is why UC Master Gardeners say to use it within 2 hours. Pour what is left down a household drain, not onto soil, a lawn or near a fish pond, and never mix bleach with anything except water or laundry detergent, as Minnesota warns.
For farms and anyone pruning many plants
The University of Arizona note says extension fact sheets generally recommend soaking tools for 2 to 5 minutes between trees when disease is visible. A simple way to keep working while one pruner soaks is to carry two: one in the container of disinfectant, one in your hand, swapping at each tree. Change the solution when it turns cloudy with dirt.
Sharpening a bypass pruner, step by step
A sharp blade makes a clean cut with less effort; University of Maryland Extension says sharp tools leave cuts without stubs, split branches or torn bark. You can use a small file, a diamond sharpener or a whetstone. The UC Master Gardeners method from Tulare and Kings Counties (2023) is:
- Clean and dry the pruner. Wear gloves and eye protection; UC lists both in its sharpening supplies.
- Find the bevel. On a bypass pruner, UC’s method sharpens the cutting blade on its bevelled (angled) side only. Leave the broad lower blade alone.
- Hold the open pruner flat. A bench vice helps, but do not overtighten it or you may bend the tool.
- Place the sharpener at about 20 degrees along the bevel side. The University of Minnesota gives a natural bevel range of 10 to 20 degrees, so match the angle that is already on your blade rather than creating a new one.
- Stroke in one direction only, from the base of the blade to the tip, 4 to 5 times. Do not saw back and forth.
- Turn the pruner over and slide the sharpener flat along the unbevelled back of the blade to remove the small burr.
- Put a drop of oil around the centre bolt and open and close the pruner about 10 times. Wipe a thin film of oil over the blade.
Keep the factory bevel and remove as little metal as possible; UC warns that taking off too much weakens the edge and shortens the tool’s life. If the blade has deep nicks, take it to a professional sharpener. Coated blades need extra care: the University of Minnesota notes that coatings can wear off, so avoid grinding the coated face. The Fiskars Xsharp in our range is described for axes and knives only, so we do not suggest it for pruners.
For an anvil pruner, check whether the blade is bevelled on one side or both. UC’s advice is that a widening gap between the blade and the anvil means the pruner needs replacing.
Dry, inspect and store
Dry tools after cleaning and check hinges, catches and handles. Keep them away from irrigation spray and in a secure, dry storage place. In a UAE garden, a bench exposed to watering or direct sun is a poor permanent storage spot.
Follow the manufacturer’s lubrication and sharpening instructions. Minnesota’s cleaning guide lists linseed, tung or mineral oil for metal and says not to use motor oil. Minnesota’s pruning tool care guide explains why blade material matters: carbon steel rusts when left with moisture and plant sap, while stainless steel resists rust but is softer and needs sharpening more often. It also warns that vinegar can promote rust on susceptible tools, so we do not suggest vinegar soaks for pruners. Its cold climate pruning season should not be copied as a UAE pruning calendar.
UC Master Gardeners of San Diego add a few habits that prevent most problems: wipe tools with a damp rag after every use, never store them wet, check pivots for wobble and tighten the centre nut, and keep tools in a bucket rather than lying on the soil while you work, because soil dulls blades.
UAE timeline for your tools
| Period | Garden work | Tool jobs |
|---|---|---|
| October to November | Bed preparation, potting and sowing as the heat breaks | Check every handle and joint before the busy season; sharpen pruners; mark depth lines on the trowel; restock alcohol |
| December to February | Planting, deadheading, shaping cuts and removing dead wood as each plant needs | Clean after every session; alcohol between plants; watch for sap build up on pruners used on euphorbias, figs and frangipani |
| March to April | Last plantings and tidy cuts before the heat | Second sharpening if pruners are pinching or tearing; deep clean and oil everything before summer storage |
| May to September | Mostly watering, shading and removing dead or diseased material | Work early in the morning; keep tools out of direct sun, where metal heads and plastic grips get very hot; wipe and oil monthly against humidity |
Villa, balcony and farm differences
- Villa: the main risks are tools left on the lawn under sprinklers and in the boot of a car. Hang tools in a garage or shaded store, away from pool chemicals and fertiliser bags, which are corrosive.
- Balcony: coastal apartments face salty, humid air. Store tools indoors in a closed box with the blades oiled, and rinse off any fertiliser or salty water residue after potting.
- Farm: dust and sand get into pivots and springs. Rinse, dry and oil daily in the season, carry a spare pruner for soaking, and label one set for known diseased blocks.
Salty irrigation water leaves a white residue on tools as well as on soil. Rinse it off with fresh water before drying and oiling, as you would after using a garden sprayer.
What to check before ordering
- Hand fit: check grip size, opening width and left or right hand suitability where specified.
- Weight: consider repeated use, not just whether you can lift the tool once.
- Capacity: for a pruner, look for a stated cutting capacity in millimetres and compare it with the thickest stems you cut often.
- Maintenance: look for clear care instructions and replacement part information.
- Storage: allow room for covered blades and protected points.
- Existing kit: avoid buying a second set when one missing tool would complete it.
Common mistakes
- Forcing a pruner through a thick branch. It springs the blades apart so they no longer meet, and it crushes the stem. Measure first and use loppers above about 25 mm.
- Using an anvil pruner on living stems. It crushes tissue against the anvil. Keep anvils for dead wood.
- Leaving pruners in bleach. Bleach pits and nicks blades. Use 70% alcohol for routine work and rinse and oil after any bleach soak.
- Disinfecting a dirty blade. Soil and sap shield the surface. Clean first, then disinfect.
- Sharpening both sides of a bypass blade. This changes the blade geometry so it no longer meets the lower blade cleanly. Sharpen the bevel only and remove the burr flat.
- Storing tools wet or in the sun. Moisture rusts carbon steel and heat ages plastic grips. Dry, oil and store in shade.
- Twisting hedge shears. Maryland says it strains the joint and wears it out. Cut straight and use a pruner on any thick twig.
Troubleshooting
| Problem | Likely cause | What to do |
|---|---|---|
| Pruner folds the stem instead of cutting | Pivot nut loose, so the blades spread | Tighten the centre nut a little at a time until the blades meet without binding |
| Ragged or torn cuts | Dull blade, or branch too large | Sharpen at the existing bevel; move to loppers for thicker stems |
| Pruner is stiff to open | Dried sap or sand in the pivot or spring | Wash with warm soapy water, dry, oil the pivot and work it open and closed about 10 times |
| Light orange rust | Stored damp | Wire brush or fine steel wool, then a thin coat of oil |
| Gap between blade and anvil grows | Wear | UC says replace the pruner |
| Disease keeps spreading along a hedge | Tools carrying infection, or the disease spreading another way | Disinfect between every plant, prune sick plants last, and get the disease identified before pruning more |
Stop and call a professional when a branch is above head height, when the cut is on a mature tree or palm, when a pruner is cracked, has a loose head or a seized joint, or when a blade has deep nicks that need regrinding. Do not use a tool whose integrity is uncertain.
Safety
- Protective equipment: gloves with good grip for all pruning, gauntlet gloves for thorny plants, eye protection when sharpening, cutting overhead or using hedge shears. Wear gloves and goggles when handling bleach if the bottle label recommends them.
- Bleach: mix in a ventilated place, never with ammonia, acids or other cleaners, only with water or laundry detergent. Rinse tools after soaking.
- Alcohol: it is flammable. Keep it away from barbecues, cigarettes and hot car interiors in summer.
- Children and pets: close the safety catch, sheath saw blades, and store pruners and disinfectants out of reach. Do not leave a bucket of disinfectant where a pet can drink from it.
- Fish and soil: dispose of used bleach solution down a household drain, never into a pond, on a lawn or in a bed.
- Height and power lines: work from stable footing and keep every tool clear of overhead cables.
- Poisoning: if anyone swallows a disinfectant, call your local poison centre or emergency services and have the bottle with you.
Frequently asked questions
Do I need all five tools for a balcony?
No. Start with a trowel and the tools your plants require. A hedge shear has little purpose if you only grow a few pots. A trowel, a small fork and a pruner or floral snips cover most balcony work.
Can a hand fork replace a spade?
For small surface jobs it may be enough. Larger planting holes and difficult ground require a suitable larger tool. Marin’s guide notes that short spades of 18 to 24 inches (about 46 to 61 cm) suit confined spaces such as courtyards.
What size branch can a hand pruner cut?
University sources give about 19 to 25 mm for hand pruners, depending on wood hardness. Check the capacity of your model; the Fiskars P90 page lists 26 mm. Above that, use loppers.
Is 70% alcohol or bleach better for pruners?
For routine cleaning between plants, 70% alcohol: it works almost immediately and does not corrode. Use a fresh 1 to 9 bleach solution after known diseased plants, then rinse, dry and oil the blades.
Should I replace a rusty tool?
Inspect its condition. Light rust comes off with a wire brush or steel wool. A seized joint, loose head, damaged blade or cracked handle needs attention before use. Ask the manufacturer about repair; do not use a tool whose integrity is uncertain.
Are stainless or coated blades maintenance free?
No. Stainless steel resists rust but is softer and needs sharpening more often, and coatings can wear off. Clean and store them properly and follow their care instructions.
When should I add loppers?
When your regular cuts exceed your hand pruner’s comfortable, specified capacity, usually around 25 mm. Choose loppers rated for the task rather than forcing your existing tool.
How often should I sharpen pruners?
When cuts start to pinch, tear or need more force. For a home garden that is often before the cool season and again in spring; heavy users will need it more often.
Build a kit you will use
For planting jobs, compare the trowel, rake and fork set. For small pruning jobs, review the P90 bypass pruner, and add the hedge shear only if you have a hedge. Share your plant types and the job you need to do with the GreenAsh team before choosing specialised equipment, and browse our garden hose guide if watering is the next gap in your kit.